
Serverless Frameworkを用いてAWSにFlask appをデプロイしてみます。
■PC環境
>Windows 10

>npm –version
8.3.1
>node –version
v16.14.0
>nodeserverless –version
Framework Core: 3.19.0
Plugin: 6.2.2
SDK: 4.3.2
>aws –version
aws-cli/2.5.6 Python/3.9.11 Windows/10 exe/AMD64 prompt/off
>仮想環境
Python 3.8.5
■フォルダ・ディレクトリを作成する
まずは、フォルダ・ディレクトリを作成します。
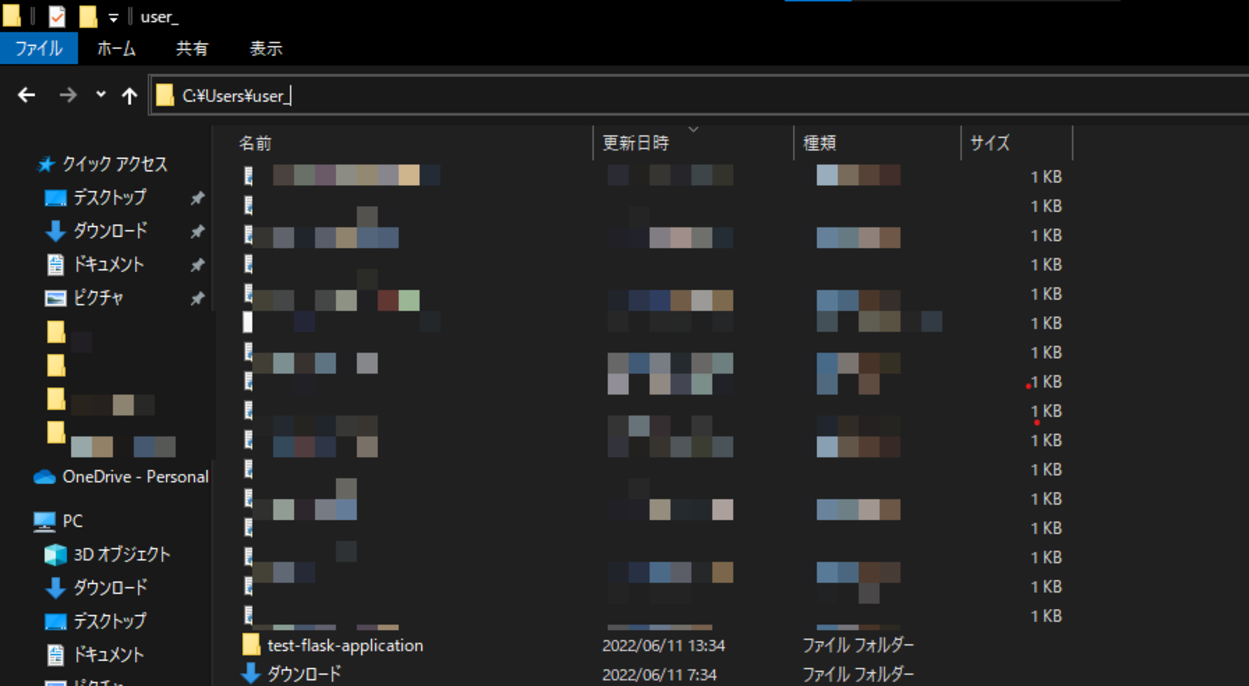
今回は「C:\Users\user_(フォルダパス)」内に「test-flask-application」というフォルダを作成しました。
■仮想環境の作成
作成後、Windows10のコマンドプロンプトを起動します。
C:\Users\user_>py -3.8 -m venv venv
起動後、上記のコマンドを入力し、Enterキーを押します。venvを使用し、仮想環境を作ります。今回は、環境名を「venv」にします。なお、今回はPythonのバージョンを「3.8」に指定しています。
Enterキーを押すと、何も出力されませんが、仮想環境が作成されます。
C:\Users\user_>.\venv\Scripts\activate
作成後、上記のコマンドを入力し、Enterキーを押します。仮想環境への切り替えを行います。
(.venv) C:\Users\user_>
Enterキーを押すと「.venv」と表示されます。これで仮想環境への切り替えが完了しました。
(.venv) C:\Users\user_>cd test-flask-application
切り替え後、上記のコマンドを入力し、Enterキーを押します。先程作成した「test-flask-application」に移動します。
(.venv) C:\Users\user_>npm init -f
移動後、上記のコマンドを入力し、Enterキーを押します。初期化処理を行い、package.jsonを生成します。
npm WARN using --force Recommended protections disabled.
Wrote to C:\Users\user_\test-flask-application\package.json:

{
  "name": "test-flask-application",
  "version": "1.0.0",
  "description": "",
  "main": "index.js",
  "scripts": {
    "test": "echo \"Error: no test specified\" && exit 1"
  },
  "keywords": [],
  "author": "",
  "license": "ISC"
}
package.jsonの内容が出力されます。
(.venv) C:\Users\user_>npm install --save-dev serverless-wsgi serverless-python-requirements
出力後、上記のコマンドを入力し、Enterキーを押します。フレームワークプラグインのserverless-wsgiと、依存関係をrequirements.txtから自動的にバンドルし、PYTHONPATHで利用できるようにするサーバーレスプラグインであるserverless-python-requirementsを「–save-dev」コマンドを用いて、ローカルインストールします。
npm WARN deprecated appdirectory@0.1.0: Package no longer supported. Contact Support at https://www.npmjs.com/support for more info.
npm WARN deprecated querystring@0.2.1: The querystring API is considered Legacy. new code should use the URLSearchParams API instead.
npm WARN deprecated formidable@1.2.6: Please upgrade to latest, formidable@v2 or formidable@v3! Check these notes: https://bit.ly/2ZEqIau
npm WARN deprecated querystring@0.2.0: The querystring API is considered Legacy. new code should use the URLSearchParams API instead.
npm WARN deprecated querystring@0.2.0: The querystring API is considered Legacy. new code should use the URLSearchParams API instead.
npm WARN deprecated superagent@3.8.3: Please upgrade to v7.0.2+ of superagent.  We have fixed numerous issues with streams, form-data, attach(), filesystem errors not bubbling up (ENOENT on attach()), and all tests are now passing.  See the releases tab for more information at <https://github.com/visionmedia/superagent/releases>.

added 427 packages, and audited 428 packages in 44s

56 packages are looking for funding
  run `npm fund` for details

found 0 vulnerabilities
Enterキーを押すと、インストールが開始され、完了となります。
■スクリプト(.pyファイル)を作成する
完了後、スクリプト(.pyファイル)を作成します。コードエディタを開きます。
■コード
from flask import Flask
app = Flask(__name__)

@app.route("/")
def hello():
return "こんにちは、世界!"
上記のコードを記述後、「main.py」という名前で、「test-flask-application」フォルダ内に保存します。
■serverless.ymlを作成する
スクリプト(.pyファイル)を作成後、コードエディタを開きます。今度はアプリケーションをデプロイするために、serverless.ymlを作成します。
■コード
service: serverless-flask

plugins:
  - serverless-python-requirements
  - serverless-wsgi

custom:
  wsgi:
    app: main.app
    packRequirements: false
  pythonRequirements:
    dockerizePip: non-linux

provider:
  name: aws
  runtime: python3.8
  stage: dev
  region: ap-northeast-1

functions:
  app:
    handler: wsgi.handler
    events:
      - http: ANY /
      - http: 'ANY {proxy+}'
コードを記述後、「serverless.yml」という名前で、「test-flask-application」フォルダ内に保存します。
■Flaskのインストール等を行う
保存後、再び起動しているWindows10のコマンドプロンプト上に戻ります。
(.venv) C:\Users\user_\test-flask-application>pip install flask
戻った後に、上記のコマンドを入力し、Enterキーを押します。pipを経由してflaskをインストールします。
Collecting flask
  Using cached Flask-2.1.2-py3-none-any.whl (95 kB)
Collecting itsdangerous>=2.0
  Using cached itsdangerous-2.1.2-py3-none-any.whl (15 kB)
Collecting importlib-metadata>=3.6.0; python_version < "3.10" Using cached importlib_metadata-4.11.4-py3-none-any.whl (18 kB) Collecting Jinja2>=3.0
  Using cached Jinja2-3.1.2-py3-none-any.whl (133 kB)
Collecting click>=8.0
  Using cached click-8.1.3-py3-none-any.whl (96 kB)
Collecting Werkzeug>=2.0
  Using cached Werkzeug-2.1.2-py3-none-any.whl (224 kB)
Collecting zipp>=0.5
  Using cached zipp-3.8.0-py3-none-any.whl (5.4 kB)
Collecting MarkupSafe>=2.0
  Using cached MarkupSafe-2.1.1-cp38-cp38-win_amd64.whl (17 kB)
Collecting colorama; platform_system == "Windows"
  Using cached colorama-0.4.4-py2.py3-none-any.whl (16 kB)
Installing collected packages: itsdangerous, zipp, importlib-metadata, MarkupSafe, Jinja2, colorama, click, Werkzeug, flask
Successfully installed Jinja2-3.1.2 MarkupSafe-2.1.1 Werkzeug-2.1.2 click-8.1.3 colorama-0.4.4 flask-2.1.2 importlib-metadata-4.11.4 itsdangerous-2.1.2 zipp-3.8.0
WARNING: You are using pip version 20.1.1; however, version 22.1.2 is available.
You should consider upgrading via the 'c:\users\user_\.venv\scripts\python.exe -m pip install --upgrade pip' command.
「Successfully installed」と出力されれば、インストールは完了です。「WARNING」が出力されていますが、警告でありエラーではないので、一旦無視します。
(.venv) C:\Users\user_\test-flask-application>pip freeze > requirements.txt
インストール後、上記のコマンドを入力し、Enterキーを押します。pipを経由してfreezeをインストールし、内容をrequirements.txtに出力します。
Enterキーを押すと何も出力されませんが、これでインストールは完了となります。
■デプロイする
(.venv) C:\Users\user_\test-flask-application>sls deploy
完了後、上記のコマンドを入力し、Enterキーを押します。ServerlessFrameworkコマンドを用いてdeployを行います。
Running "serverless" from node_modules

Warning: Invalid configuration encountered
at 'functions.app.events.1.http': value 'ANY {proxy+}' does not satisfy pattern /^(?:\*|(GET|POST|PUT|PATCH|OPTIONS|HEAD|DELETE|ANY) (\/\S*))$/i

Learn more about configuration validation here: http://slss.io/configuration-validation

Deploying serverless-flask to stage dev (ap-northeast-1)
Warning: Please change "wsgi.handler" to "wsgi_handler.handler" in serverless.yml
Warning: Using "wsgi.handler" still works but has been deprecated and will be removed
Warning: More information at https://github.com/logandk/serverless-wsgi/issues/84
Python executable not found for "runtime": python3.8
Using default Python executable: python
Packaging Python WSGI handler...

✔ Service deployed to stack serverless-flask-dev (151s)

endpoints:
ANY - https://****.execute-api.ap-northeast-1.amazonaws.com/dev
ANY - https://****.execute-api.ap-northeast-1.amazonaws.com/dev/{proxy+}
functions:g (0s)
app: serverless-flask-dev-app (1.6 MB)

1 deprecation found: run 'serverless doctor' for more details

Toggle on monitoring with the Serverless Dashboard: run "serverless"
Enterキーを押すと、デプロイが開始され、しばらくすると完了となります。完了後、「https://****.execute-api.ap-northeast-1.amazonaws.com/dev」といったURLが出力されますので、このURLをコピーします。
コピー後、Webブラウザを起動し、アドレスバーにURLを貼り付けてアクセスします。
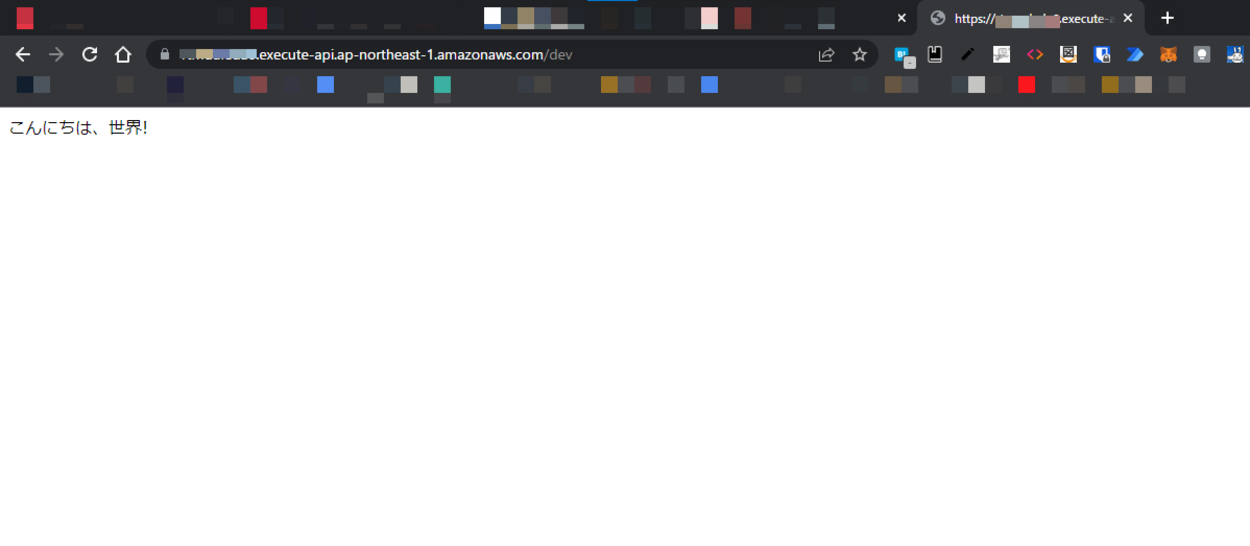
アクセスしてみると、スクリプト(.pyファイル)内のdef文で定義した関数が呼び出され、returnで設定した日本語の文字列を表示させることができました。
なお、ServerlessFrameworkコマンドを用いてdeployを行う際に「Deployment bucket has been removed manually. Please recreate it or remove your service and attempt to deploy it again」というエラーが出力される場合は、serverless.yml内の「service: ***」の「***」を変更することで、デプロイができる。
また、今回ServerlessFrameworkコマンドを用いてdeployを行う際に、下記の警告が出力されました。
Warning: Invalid configuration encountered
at 'functions.app.events.1.http': value 'ANY {proxy+}' does not satisfy pattern /^(?:\*|(GET|POST|PUT|PATCH|OPTIONS|HEAD|DELETE|ANY) (\/\S*))$/i

Learn more about configuration validation here: http://slss.io/configuration-validation
この警告を改善するには、serverless.yml内の下記のコードに変更しデプロイすると、警告が出力されなくなる。
■コード(変更前)
functions:
  app:
    handler: wsgi.handler
    events:
      - http: ANY /
      - http: 'ANY {proxy+}'
■コード(変更後)
functions:
  app:
    handler: wsgi.handler
    events:
      - http: ANY /
      - http: 'ANY /{proxy+}'
コメント