Webページに3Dコンテンツを表示するJavaScriptライブラリ「Three.JS」を使用してみます。
■CDNからthree.jsをロードする
Three.JSを使用するために、今回はCDNからthree.jsをロードし使用してみます。
■コード
<script type="module">
    import * as THREE from 'https://cdn.skypack.dev/three';
</script>今回は、インストールやビルドツールなしで最適化されたnpmパッケージをロードでき、個人・商用を問わず永久無料で利用できるSKYPACK(https://www.skypack.dev/)を使用します。
■コード
<!DOCTYPE html>
<html lang="ja">
    <meta charset="UTF-8">
    <meta http-equiv="X-UA-Compatible" content="IE=edge">
    <meta name="viewport" content="width=device-width,initial-scale=1.0">
    <title>Three.JSのテスト</title>
    <!--背景-->
    <style>
        body{
            background: #000;
            padding: 0px;
            margin: 0px;
        }
    </style>
<body>

    <script type="module">
        import * as THREE from 'https://cdn.skypack.dev/three';
        //シーン
        const scene = new THREE.Scene();
        //カメラ
        const camera = new THREE.PerspectiveCamera(75,window.innerWidth / window.innerHeight,0.1,1000);
        //Renderer
        const renderer = new THREE.WebGLRenderer();
        //直方体のジオメトリクラス
        const geometry = new THREE.BoxGeometry();
        //ジオメトリを描画するためのマテリアル
        const material = new THREE.MeshBasicMaterial( { color: 0xFF0000 } );
        //メッシュの作成
        const cube = new THREE.Mesh( geometry, material );

        //シーンにキューブを追加
        scene.add(cube);
        renderer.setSize(window.innerWidth,window.innerHeight);
        camera.position.z = 5;
        document.body.appendChild(renderer.domElement);
        //アニメーション
        function animate(){
            requestAnimationFrame(animate);
            renderer.render(scene,camera);
        }
        animate();

        setInterval(function(){
            cube.rotation.x += 0.01;
            cube.rotation.y += 0.01;
        },5);
    </script>
</body>
</html>
three.jsを介してオブジェクトを表示するには、scene、camera、およびcameraを介してcameraをレンダリングするrendererの3つが必要となりますので、これらを作成します。
そのほかにもメッシュの作成などを行い、今回はcube(3Dコンテンツ)を表示させてみます。
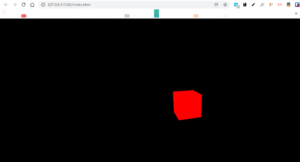
cube(3Dコンテンツ)を表示させ、アニメーションを追加します。追加したものをWebページで表示させます。
■検証・実行
今回のコードを「index.html」という名前で保存し、Visual Studio Code(VSCode)の拡張機能で、簡易的なローカルサーバーを起動することができる「Live Server」を使用し、Webページを表示させてみます。
「Live Server」を起動しWebページを表示させてみると、今回作成したcube(3Dコンテンツ)を表示させることができました。


コメント